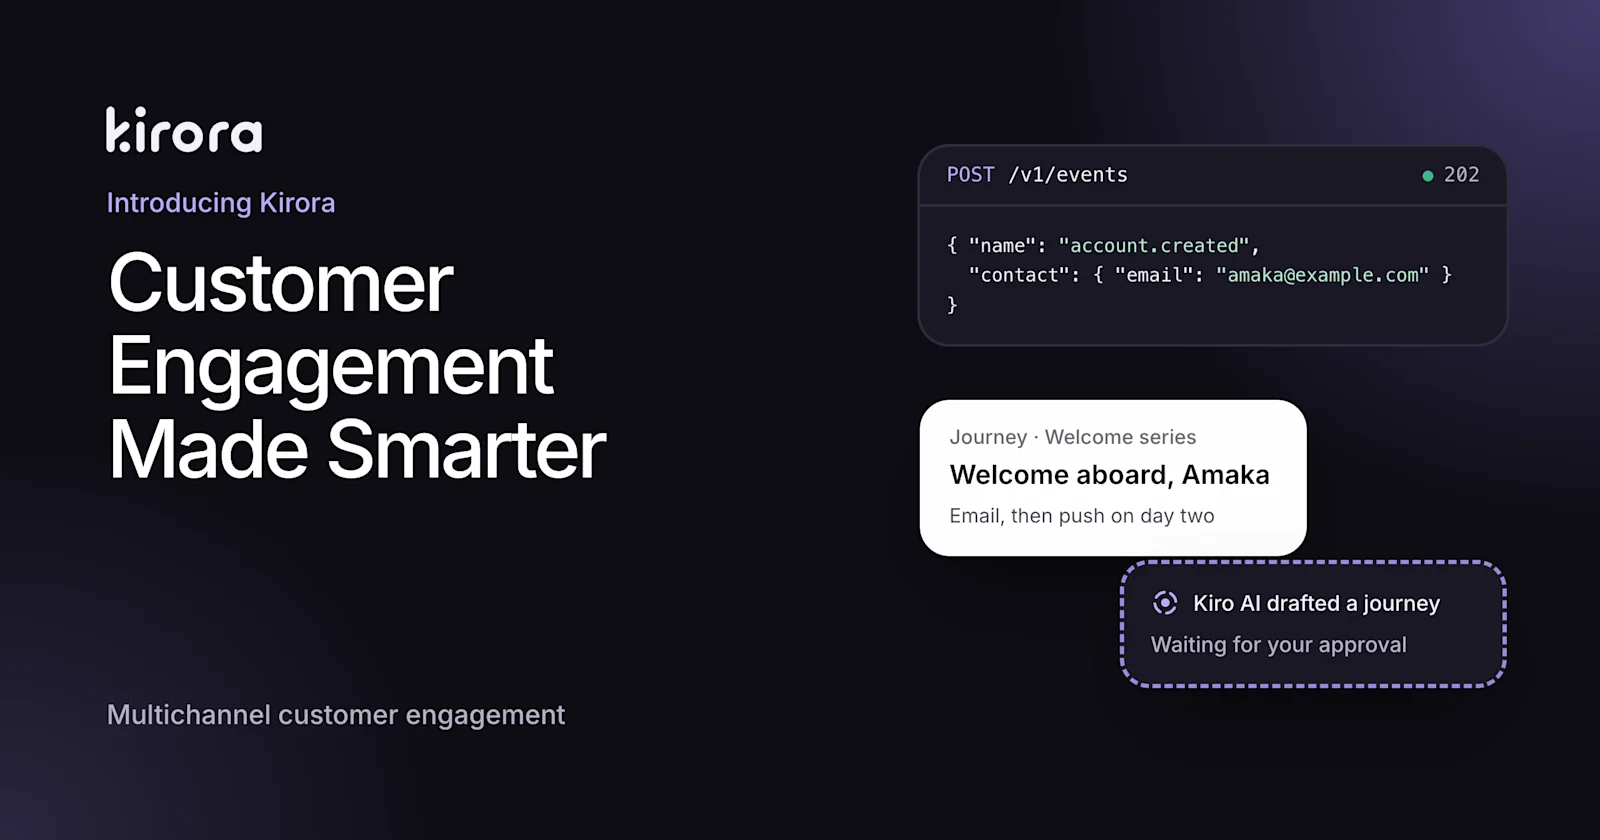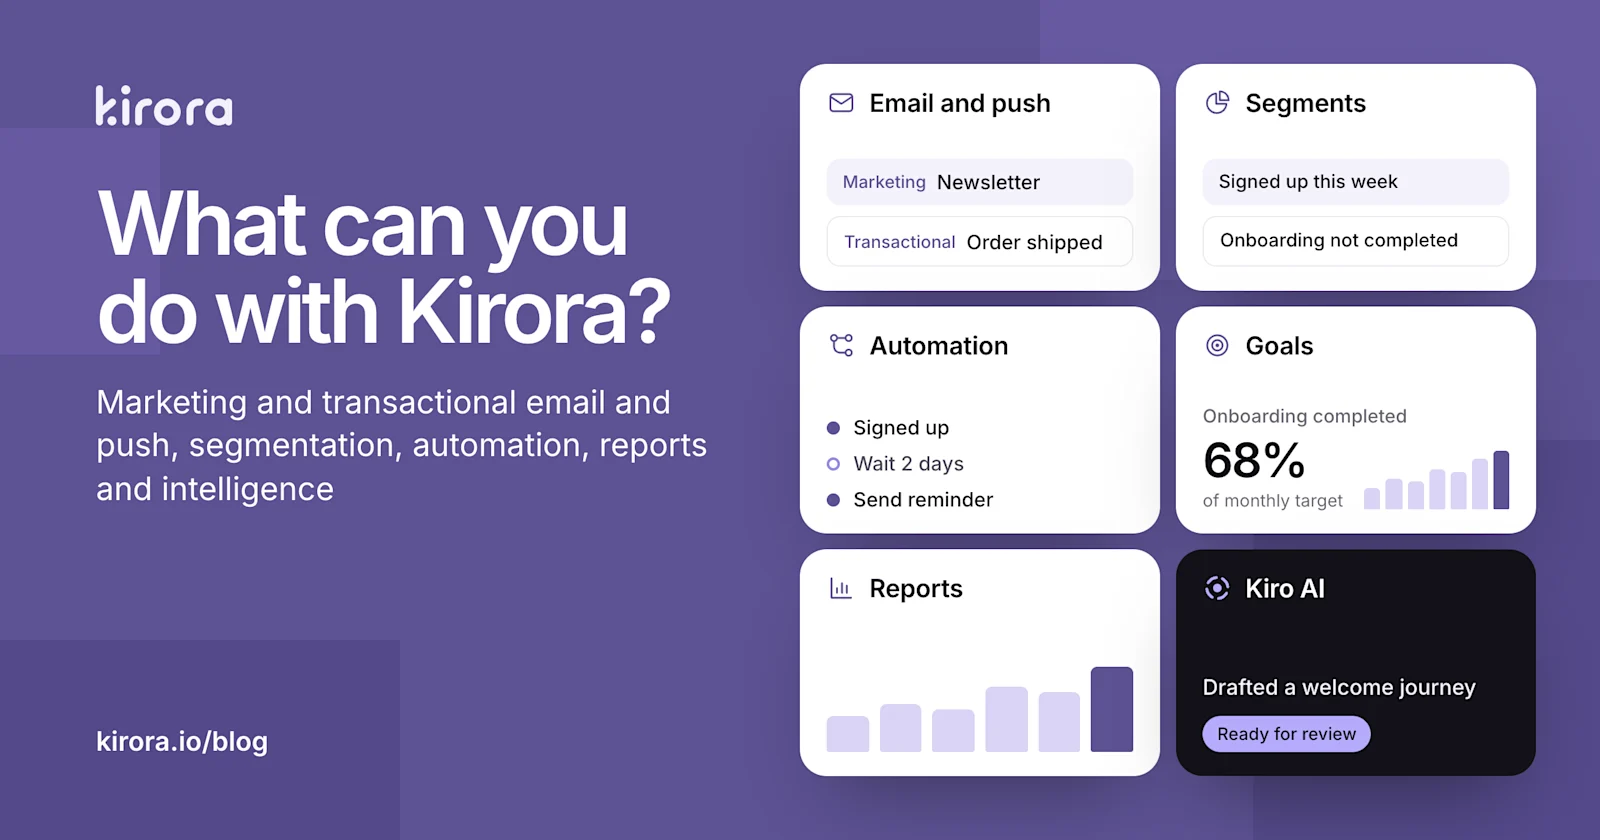
Kirora is an AI-powered customer engagement platform for email and push campaigns, automated follow-ups, and transactional messages.
Connect customer profiles and activity from your app, build audiences, and prepare messages with Kiro AI. Your team controls what gets published, scheduled, or activated.
You can start with a single workflow, such as an order confirmation or welcome email, and connect more of your customer communication as your needs grow. This guide explains the main ways to use Kirora and how its features work together.
Screenshots show a demo workspace with sample data.
1. Send transactional messages from your app
When someone creates an account, resets a password, or makes a payment, they need a message tied to that action.
Kirora lets developers send transactional email and push notifications through APIs and SDKs. Common uses include:
Account verification and sign-in codes
Password reset emails
Order confirmations and receipts
Payment confirmations and account alerts
Product and service notifications
Your application triggers the message, while delivery reporting helps your team inspect what happened after it was sent.
You can also manage published email templates in the dashboard and send them from your app by template name. That lets your team update wording and design without changing the application code for every content edit.
For example, an online store could send an order receipt from its checkout flow while its marketing team maintains the receipt template in Kirora.
Explore: Transactional messaging
2. Create email and push campaigns
Use campaigns to announce a feature, share a newsletter, promote an offer, or reconnect with an audience.
Kirora supports email campaigns and push notifications for web, iOS, and Android. You can choose an audience, personalise messages with customer information, and send immediately or schedule for later.
Push notifications require a connected app or browser, a registered device, and the customer's permission to receive notifications.
Design branded emails
The visual email designer lets you create emails without writing HTML. Start with a template, customise the layout, add your brand elements, and preview the message before sending.
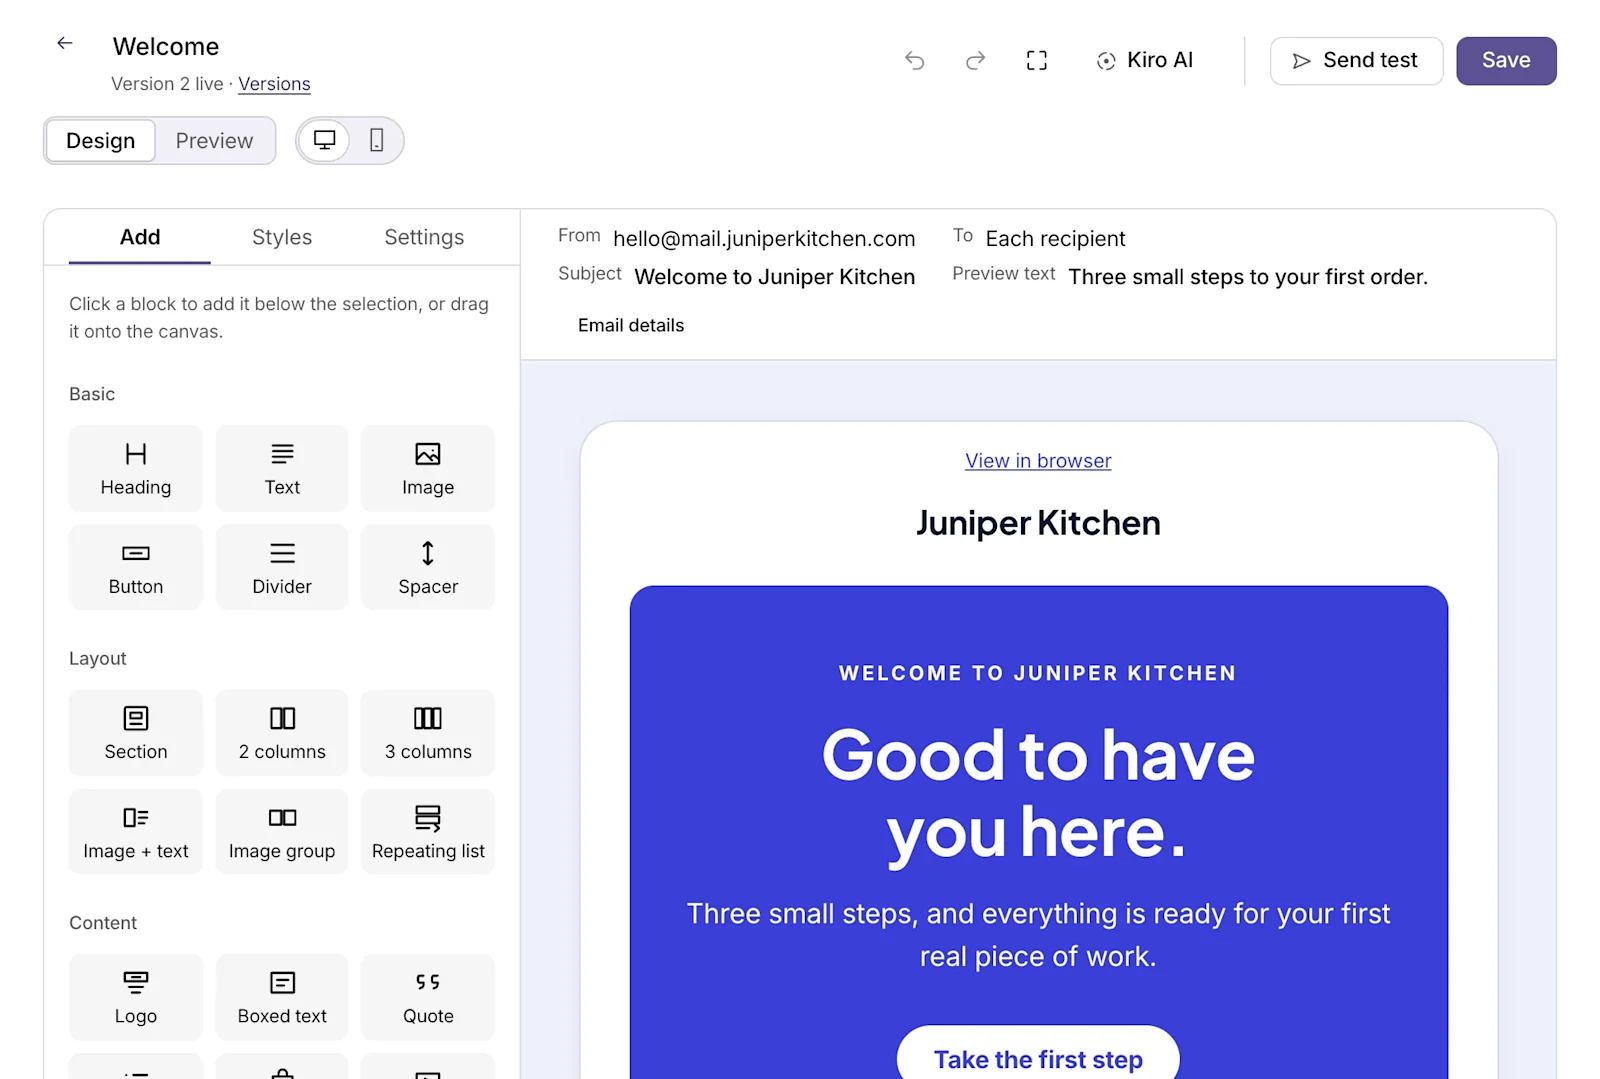
For a product announcement, you could build an email, select customers whose activity makes the update relevant, and schedule delivery. A separate push campaign could reach eligible customers who have opted in.
Compare message variations
A/B testing lets you send variations to part of your audience, then send the winner to the rest. Choose the measure that decides the winner, such as email clicks or push taps, and let Kirora select it automatically or choose it yourself.
A test covers one channel at a time: email only or push only.
Explore: Email and push campaigns
3. Build audiences from customer details and activity
Customer profiles tell you who someone is. Behavioural events tell you what they have done.
Your application can send events to Kirora through APIs and SDKs. For example:
UserSignedUpOnboardingCompletedProductViewedCheckoutStartedPurchaseCompletedSubscriptionCancelled
These names are examples. Your application defines the events and properties that matter to your business.
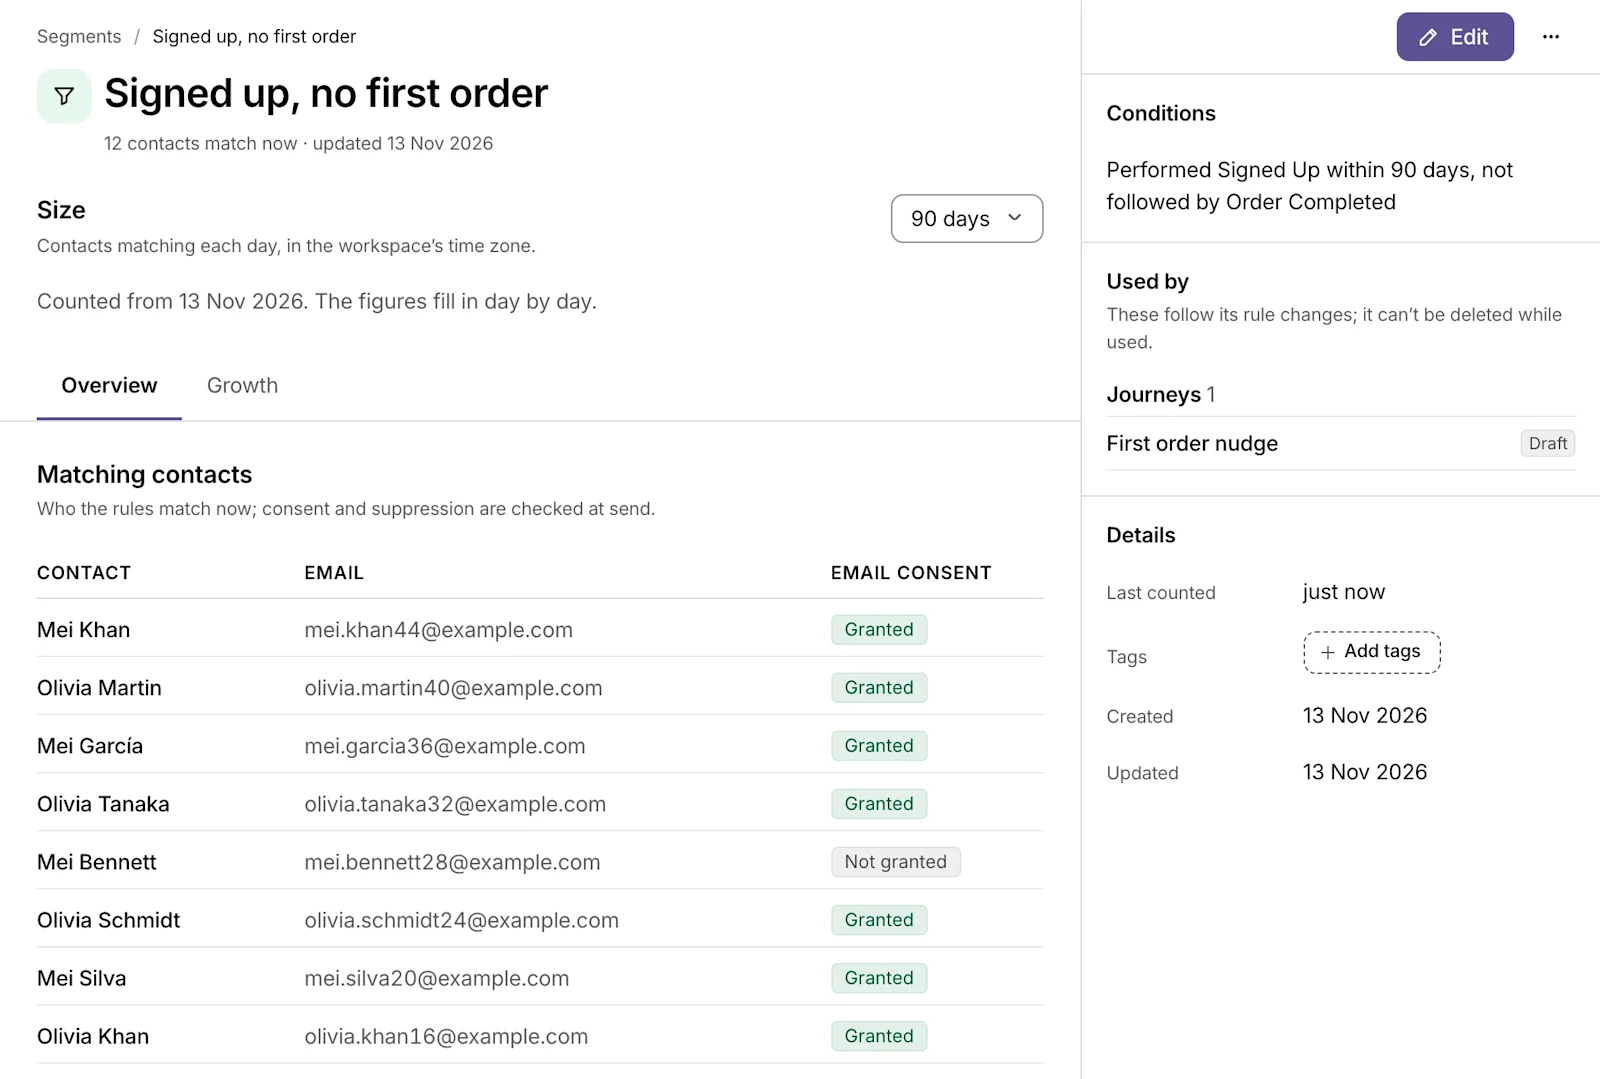
Use those events alongside customer attributes and engagement history to build segments. You could group customers who signed up recently but haven't completed onboarding, or shoppers who started checkout without completing a purchase.
Membership updates as customers meet or stop meeting the segment's conditions. That gives your team an audience it can use for campaigns and automated follow-ups without repeatedly assembling the same list by hand.
The quality of those audiences depends on the information you connect. If a segment relies on purchases or completed onboarding, your app or an integration needs to report that activity to Kirora.
Explore: Audience segmentation
4. Automate customer follow-ups with journeys
A journey connects messages, waits, and decisions into an automated workflow. Customer activity, dates, or other configured conditions determine when people enter and what happens next.
Consider an onboarding journey for a software product:
Welcome the customer. When your app reports a signup, the journey sends the welcome email you prepared.
Wait two days. Give the customer time to complete setup.
Check their progress. If onboarding is still incomplete, send a push reminder to customers with a registered device and permission to receive it.
End further follow-ups. When your app reports completed onboarding, an exit rule removes the customer from further onboarding steps. It does not recall a message already queued for delivery.
Your team reviews and activates the journey. After activation, it runs according to the rules you set.
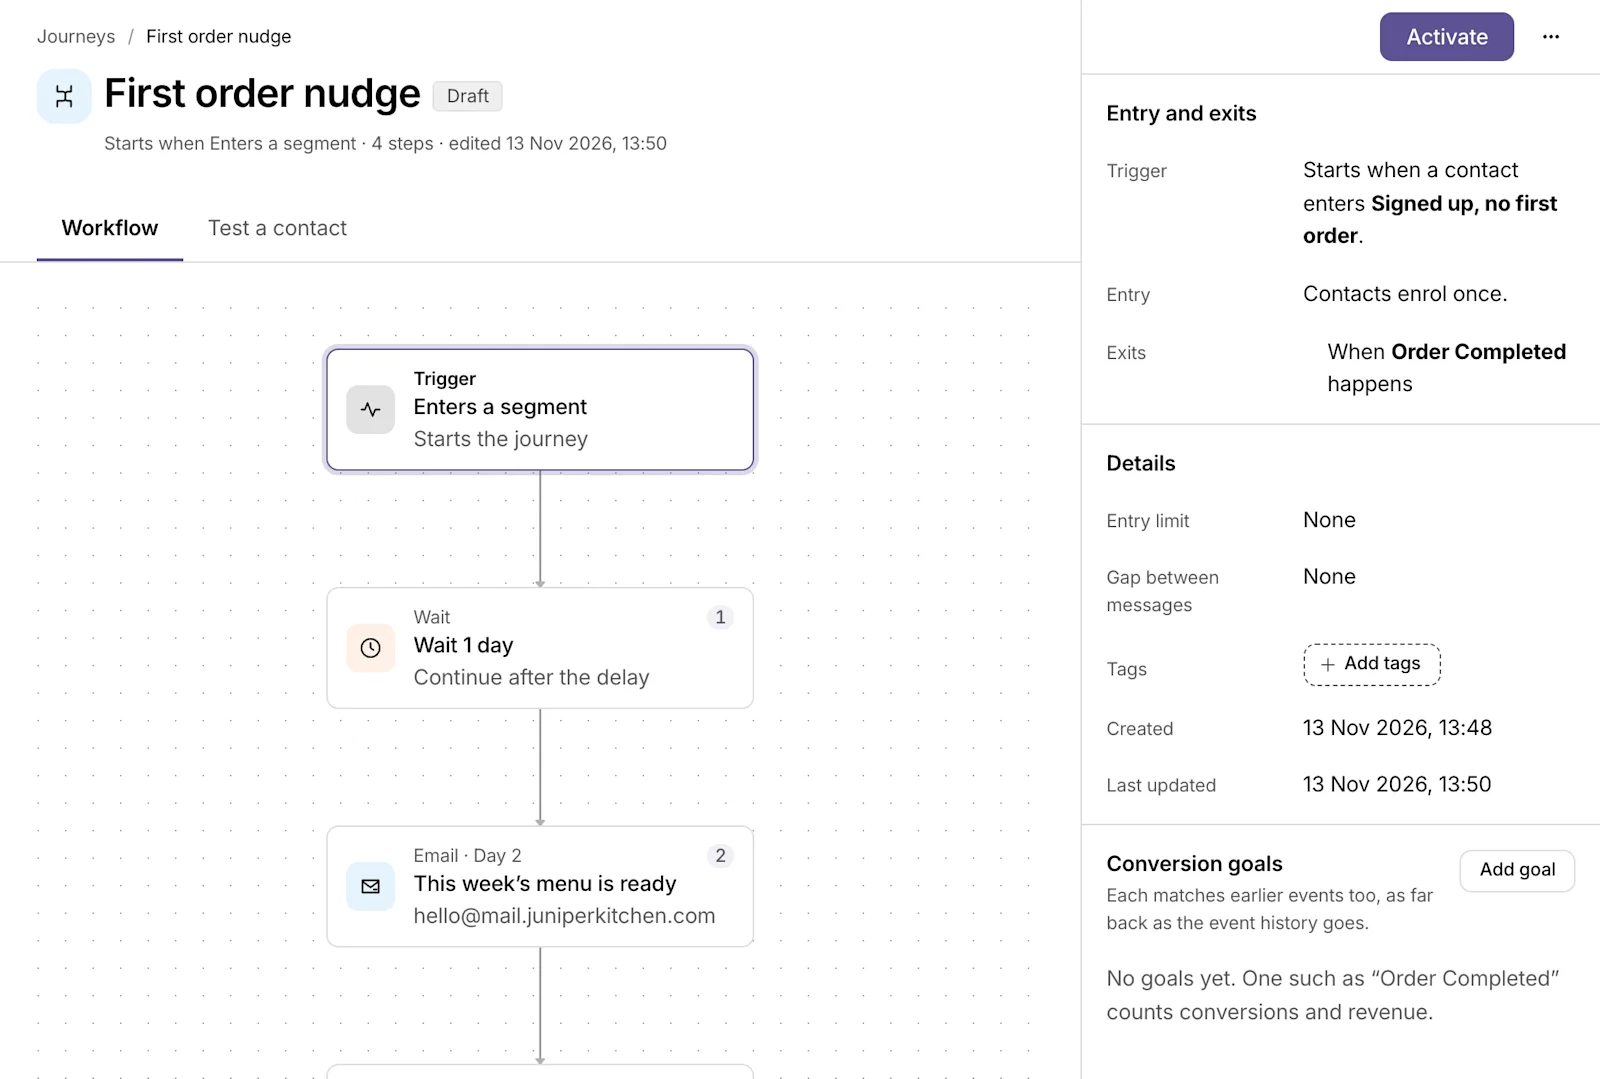
Start with a journey recipe
Kirora provides recipes for workflows such as welcome sequences, abandoned cart recovery, trial expiry reminders, win-back campaigns, and birthday messages.
Customise the triggers, content, timing, and conditions for your business. Configure consent preferences, quiet hours, and marketing message limits to control who can receive messages and when.
Explore: Automated customer journeys
5. Set goals for business outcomes
Use Goals to track the outcomes your team wants to improve, such as completed onboarding, first purchases, or subscription renewals.
Choose a measure based on your recorded events and optionally add a target. Kirora shows the result over time and, when you set a target, progress towards it.
For example, a software business could measure the share of new signups who complete onboarding. A store could track purchases, while a membership business could monitor renewals.
Workspace Goals measure an outcome across your business. Campaign and journey conversion goals serve a different purpose: they credit recorded events to particular messages under the attribution rules you configure.
That distinction helps your team separate overall business progress from the results attributed to individual campaigns or journeys.
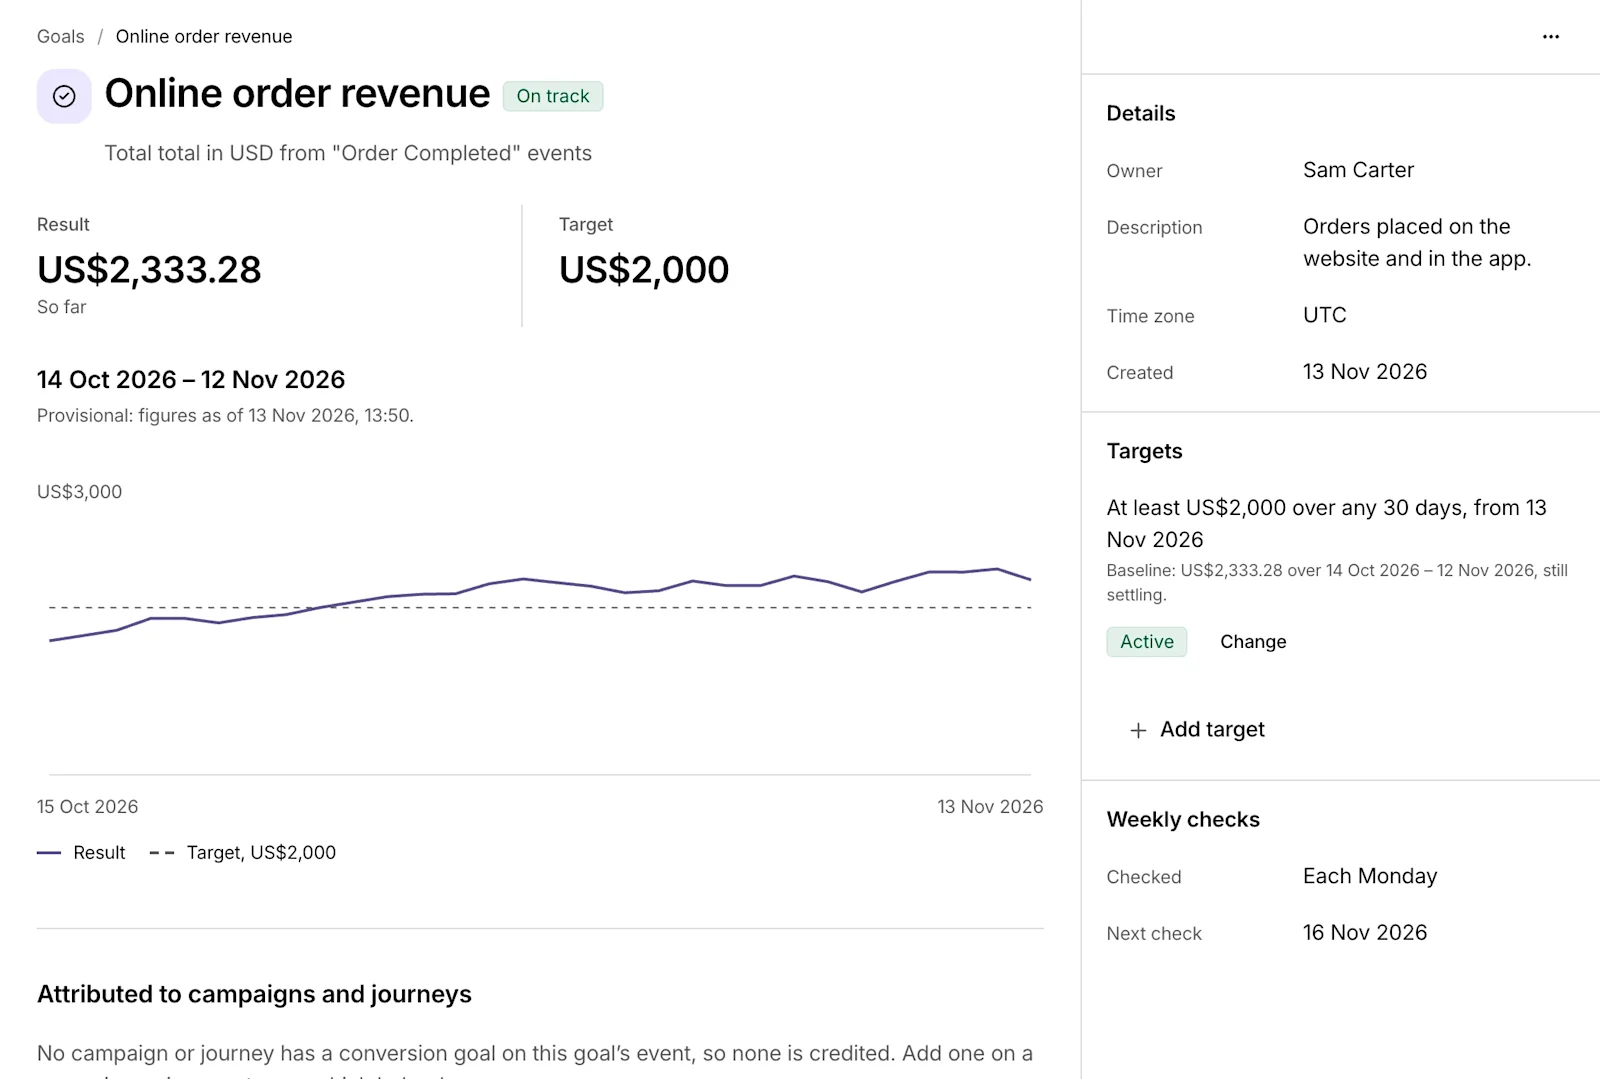
Explore: Goals
6. Review delivery, engagement and attributed results
Kirora's reports help you review message performance, understand customer behaviour, and investigate the results behind a headline number. Available reports depend on your plan and the data you have connected.
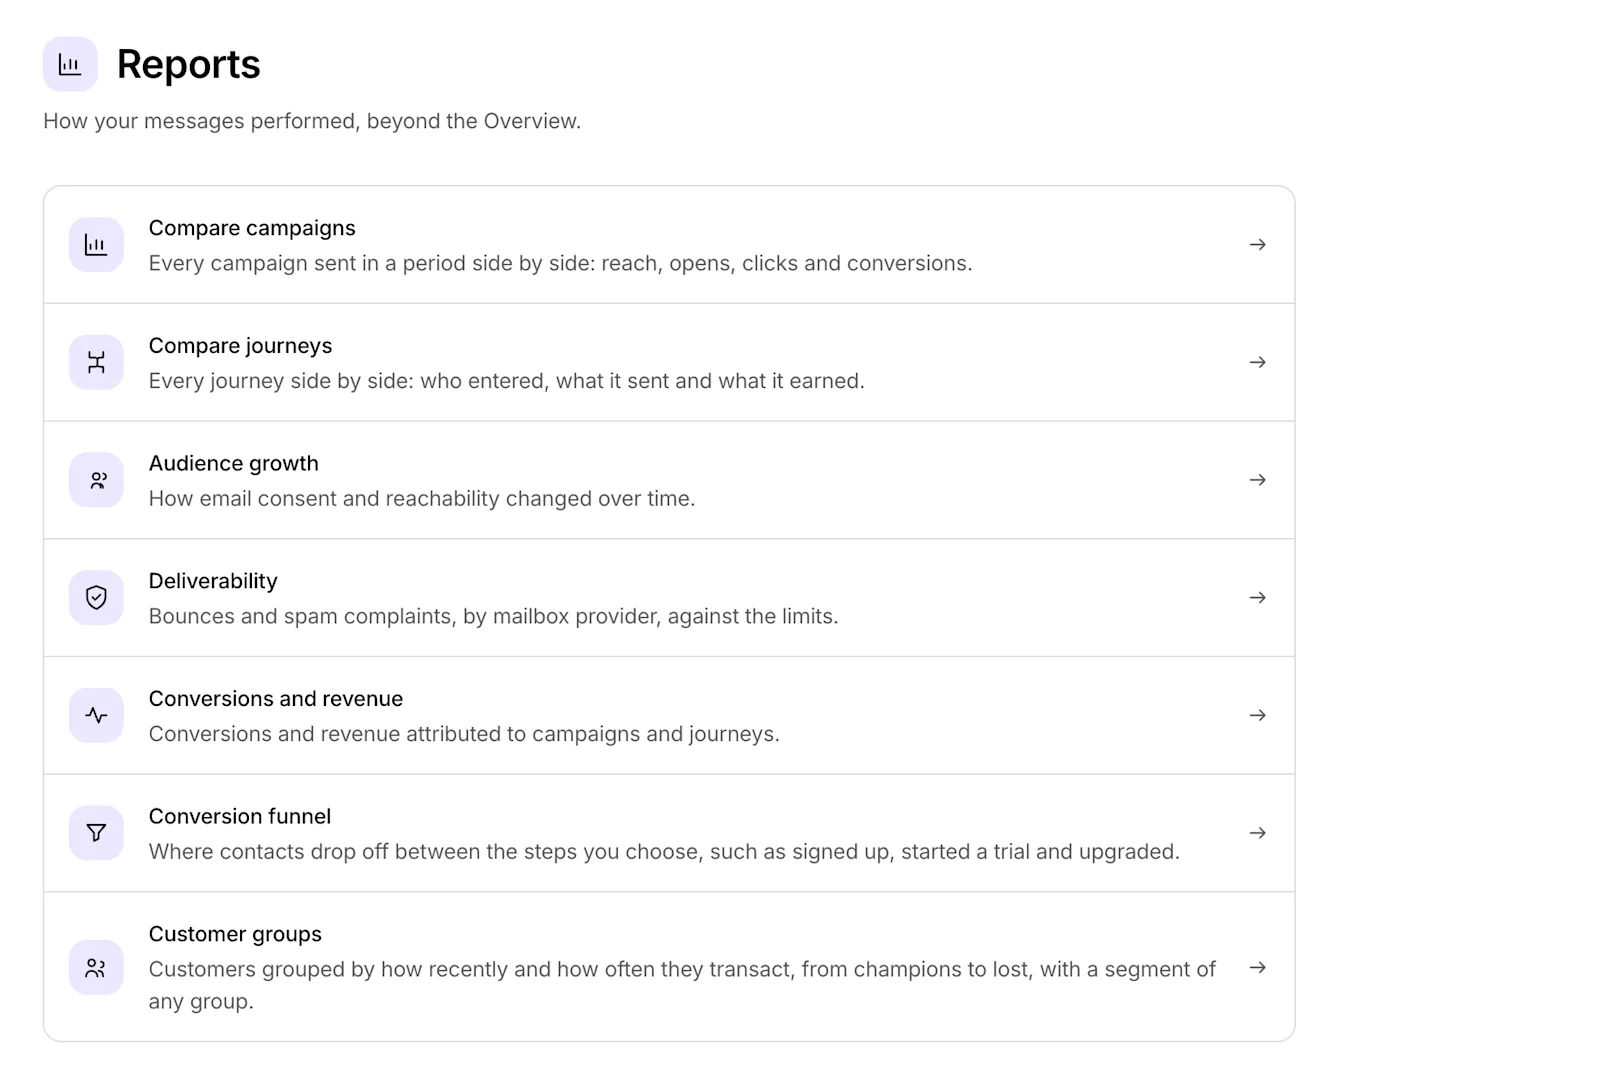
Compare messages and investigate delivery
Compare campaigns and journeys side by side, from reach and engagement to conversions and attributed revenue. Export those comparisons to CSV for further analysis or team reviews.
Individual campaign and journey results let you inspect recipient outcomes, top clicked links, and journey step performance. Transactional messages have their own delivery report.
For email, review bounces and complaints by mailbox provider and explore recorded engagement by email app, device, and operating system. App and device reporting requires the recording setting to be enabled and excludes contacts in the EEA and UK.
For push, review what notification services accepted or refused by platform, alongside devices and consent gained or lost over time. A service accepting a push does not confirm that it appeared on the customer's device.
Understand where customers stop and return
Build a conversion funnel from events your application reports, such as signup, setup started, and onboarding completed. See where contacts stop between steps, then inspect the people behind the counts.
Retention reports group contacts by when they first performed an event and show who returns in later weeks or months. Choose the starting event and the event that counts as a return. A membership business, for example, could see what share of new members book another session in the following weeks.
Audience growth shows changes in email consent and reachability. Customer groups organise customers by how recently and how often they transact, with a way to create a segment for follow-up.
The Best time to send report shows email opens, clicks, or push taps by weekday and hour. Use those observed patterns to choose a time to test.
Measure conversions and attributed revenue
Configure the event that counts as success and the attribution window for your campaigns and journeys. Revenue reporting also needs the relevant amount and currency information.
Review attributed conversions and revenue over time to see which messages deserve a closer look. One campaign might receive more clicks while another has more attributed purchases.
Attributed revenue follows your configured rules; it does not establish that a message caused a purchase.
Build custom reports and schedule team updates
Create and save a custom report for recorded events, message outcomes, conversions, or attributed revenue. View results by day, week, or month, with supported breakdowns such as country, campaign, journey, contact attribute, or segment membership.
For example, you could track weekly signups by country or compare email clicks across campaigns over time.
Schedule report emails daily, weekly, or monthly for selected workspace users. Emails link to the report; campaign and journey comparisons can also include a CSV file. This gives your team a recurring review without rebuilding the same report each time.
Explore: Kirora reports
7. Prepare work and understand results with Kiro AI
Kiro AI helps you draft messages, audiences, and automation flows. It also answers questions using your workspace data.
Ask about your results
You can ask questions such as:
Which campaign had the most attributed conversions last month?
How did our recent campaigns perform?
How is our deliverability looking?
What journeys are running right now?
Kiro AI uses the workspace information available to it and shows the sources behind its answers. This gives your team a starting point for reviewing results and deciding what to investigate next.
Create an editable draft
Ask Kiro AI to prepare an email campaign, a push campaign, a segment, a signup form, or a journey.
For example:
Create a welcome journey for new customers with an introductory email and a follow-up reminder after two days.
Review the proposed audience, content, timing, and conditions before putting the work into use. Kiro AI also offers ready-made tasks for work such as finding where your funnel loses contacts or reviewing a month's results.
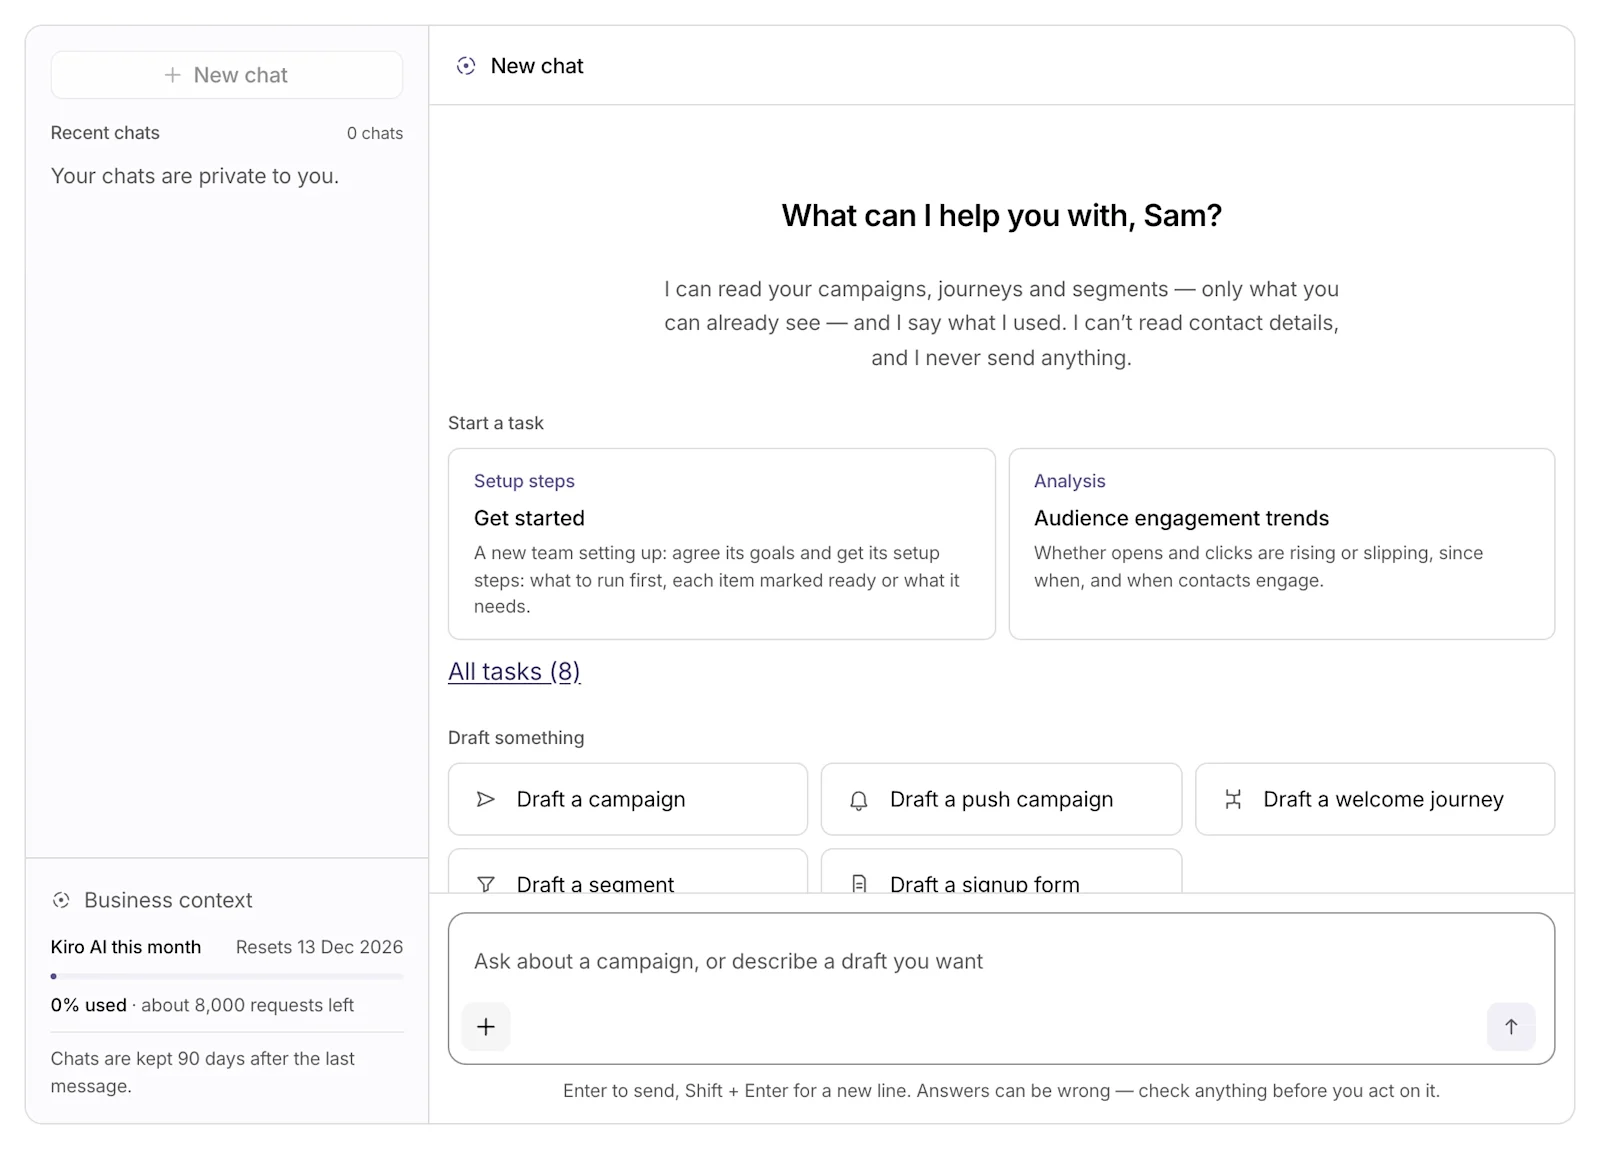
Keep control of what goes live
AI prepares the draft. Your team decides what goes live.
People control publishing, scheduling, sending, and journey activation. Once a person activates a journey, its messages run under the approved rules without requiring approval for each message.
Explore: What Kiro AI can do
8. Collect signups with forms and popups
Kirora's signup forms help you collect customer information, record consent, and add contacts to your workspace.
Share a hosted signup page or add a form to your website as an embed or popup. Connect the signup to the list and follow-up workflow you configure.
For example, a newsletter form could add subscribers to a list and start a welcome journey. The first email could introduce your business and explain what subscribers can expect to receive.
This connects audience collection with the messages that follow, so your team can manage the signup and welcome experience together.
Explore: Forms and popups
9. Connect Kirora to your existing tools
Developers can connect customer profiles, events, and transactional messages through APIs and SDKs. Marketers and product teams can then manage campaigns, audiences, and journeys in the dashboard using that shared information.
Webhooks let your systems receive supported event notifications, while integrations bring in customer information from connected tools. The setup you need depends on the data and workflow you want to use.
Connect compatible AI assistants through the Model Context Protocol (MCP) to work with Kirora from those tools. With restricted agent access, an assistant can read permitted workspace information and prepare supported drafts. Your team reviews and authorises sending, scheduling, or activation in Kirora.
You can begin with one connection and expand as you introduce more workflows.
Explore: Developer documentation
Start with one workflow
Choose a first workflow that solves an immediate need:
Engineering: Send a transactional email from your application and inspect its delivery result.
Marketing: Create an audience, prepare a newsletter, and review it before sending.
Product or growth: Connect signup and onboarding events, then build a welcome journey with a reminder and an exit rule.
Each team can work from shared customer information while managing its part of the communication.
Start with Kirora's Free plan. Pricing shows the features and allowances in each plan, Kiro AI included.
You can prepare campaigns while you verify your sending domain and complete Kirora's review. Email sending starts after those checks are complete.